
This post (likely) contains affiliate links, including Amazon Associates links, and I may receive a small commission if you click one. This is at no extra cost to you.
If you’re planning a Christchurch to Mount Cook road trip, a campervan might just be the best decision you make. There are many ways to travel around New Zealand. But undoubtedly one of the best is to have your own transport; it gives you the freedom to explore at your own pace and visit some of the more remote (and stunning) parts of the country that are harder to access via bus networks. And the best of your own transport? A campervan!
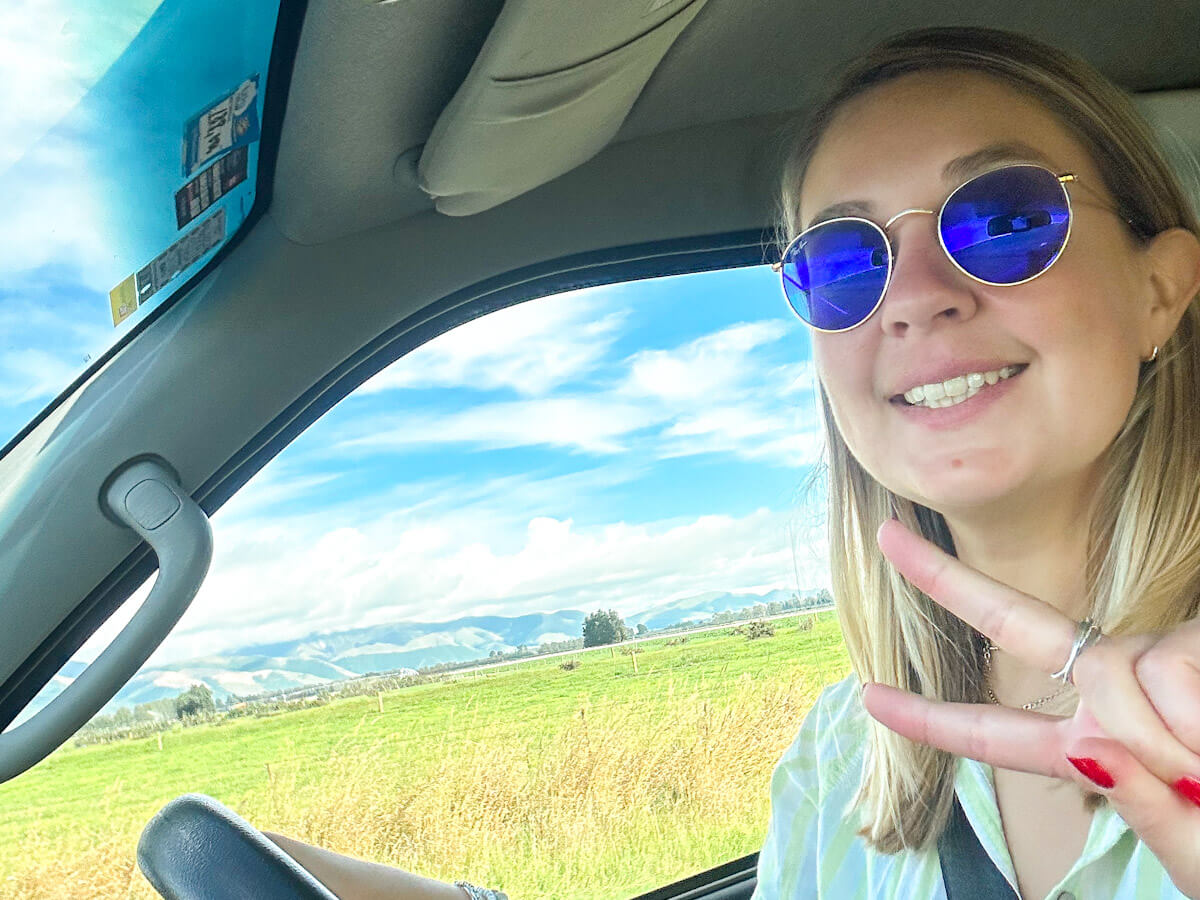
During my time solo travelling in New Zealand, I decided I wanted to have this experience, so I hired a campervan for a week, not to travel the whole country, but just for this one part: from Christchurch to Mount Cook (and back!). It was the perfect amount of time to dip my toes into van life. This corner of New Zealand also happens to be one of the most spectacular places to do it, so this is the 7-day itinerary I followed, including some stops you won’t find on most travel blogs.
Why Do a Christchurch to Mount Cook Road Trip?
This Christchurch to Mount Cook route cuts through the middle of New Zealand’s South Island, the Mackenzie Country, and it is possibly the most scenically dramatic stretch of road in the entire country. You’ll drive alongside incredibly blue glacial lakes, through wide open tussock plains with the Southern Alps as your backdrop, and into Aoraki Mount Cook National Park itself.
The problem with visiting Mount Cook without your own transport is time. Day trips from Christchurch exist, but they’re long and don’t give you enough time to enjoy the area. But by campervan, you can stop whenever you want, including sleeping in some of the South Island’s best freedom camping spots, and get to see some of the remoter parts.
My route also has a few stops that most New Zealand itineraries miss entirely, which is exactly why I wanted to share how I spent a week in my campervan. Also, if you are a fan of The Lord of the Rings, this is a route that might appeal!
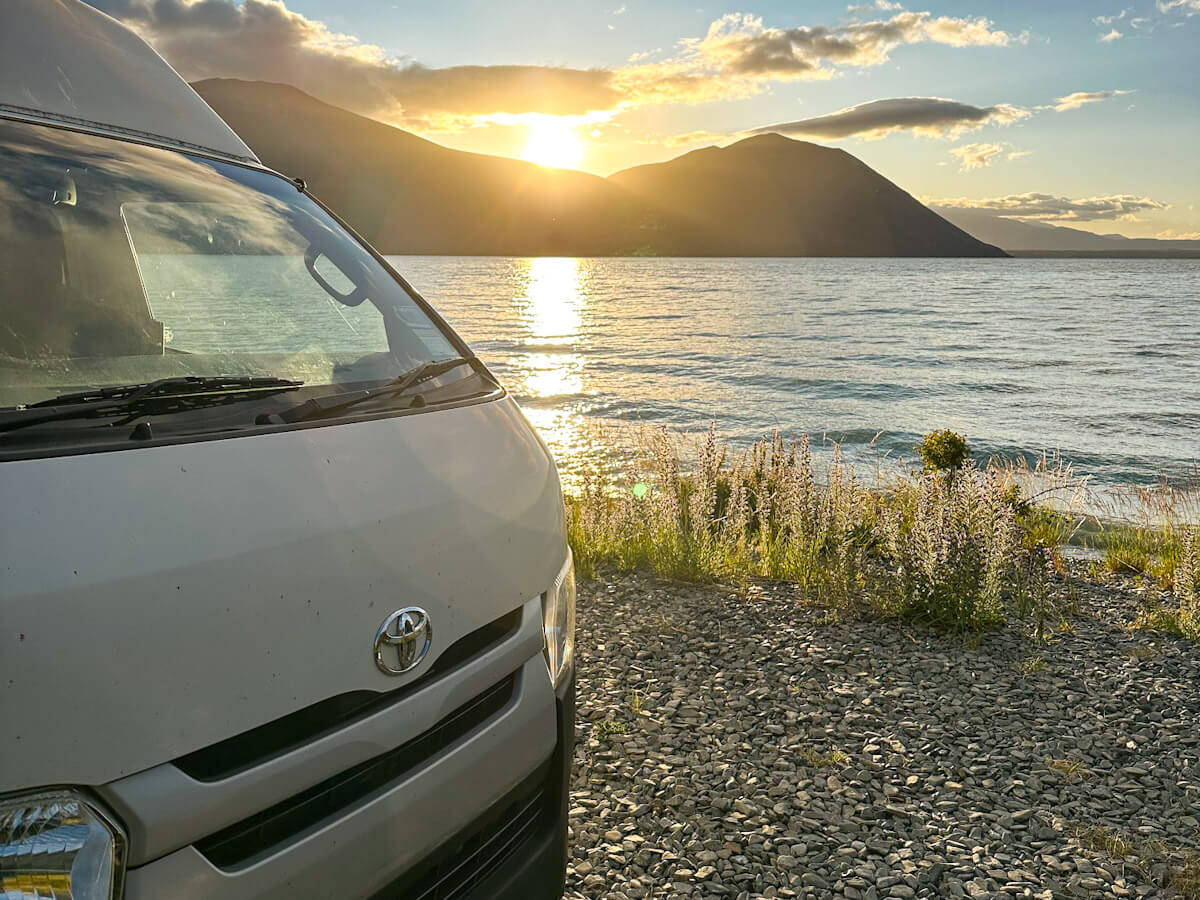
The Christchurch to Mount Cook Campervan Route at a Glance
| Day | Key Stops | Overnight | Approx Drive Time | Approx Distance |
| Day 1 | Christchurch → Akaroa | Akaroa | 1.5 hours | 85 KM |
| Day 2 | Mount Sunday | Mount Somers | 3.5 hours | 180 KM |
| Day 3 | Geraldine, Fairlie, Three Creeks | Lake Tekapo | 3 hours | 160 KM |
| Day 4 | Twizel, Pelennor Fields, Peace Ring | Lake Ōhau | 2.5 hours | 120 KM |
| Day 5 | Pukaki Flats, Mount Cook | Mount Cook | 1.5 hours | 70 KM |
| Day 6 | Mount Cook National Park | Mount Cook | – | – |
| Day 7 | Mount Cook → Christchurch | – | 4.5 hours | 320 KM |
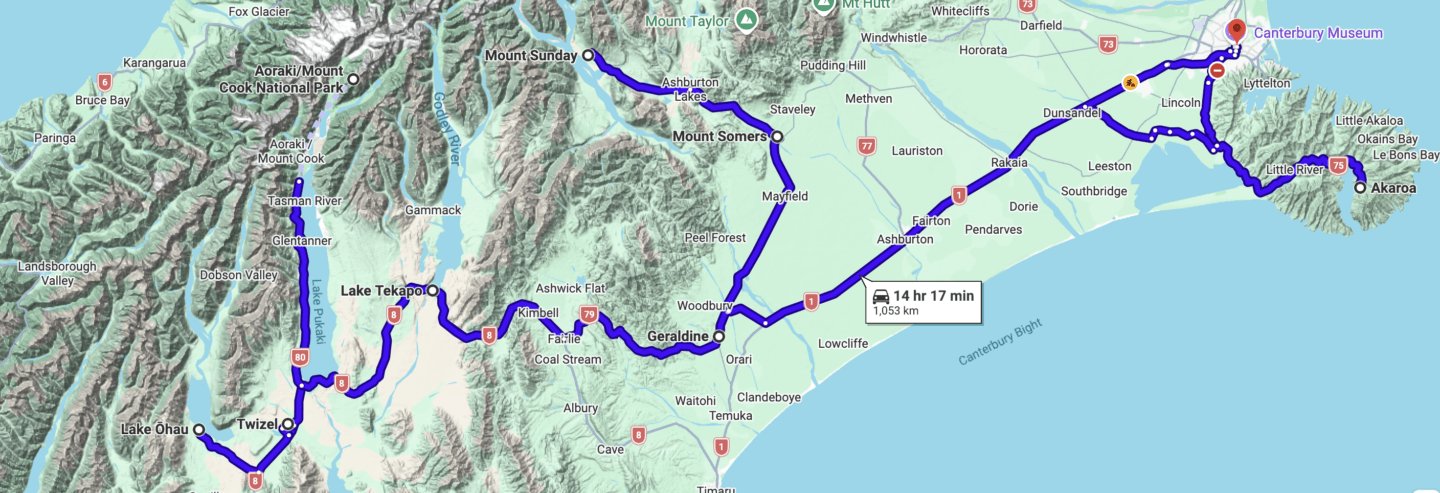
The Christchurch to Mount Cook Campervan Route In Detail
Day 1: Christchurch to Akaroa
Start your journey by picking up your campervan in Christchurch. Before heading out of town, make your first stop a local supermarket to stock up on essentials for the week ahead.
Once the “van admin” is out of the way, head toward the Banks Peninsula to reach Akaroa. The drive is the perfect way to start your trip. It’s a manageable distance that lets you get used to your van. As you leave the flat Canterbury Plains and begin the winding climb over the crater rim, you’ll be rewarded with breathtaking views of the Pacific Ocean.
Top Tip: By picking up your campervan near the airport, you avoid having to navigate busy city streets while you’re still getting a feel for your vehicle. Check out options HERE
What to do in Akaroa:
I was blown away by this place. I didn’t expect somewhere so charming so close to Christchurch, and I wish I had had even more time there. When you arrive in Akaroa, make sure not to miss the following:
- Explore the French Heritage: Akaroa is a unique historic French settlement. Take a stroll along the waterfront to admire the colonial architecture and French-influenced street names.
- Visit The Giant’s House: Sadly, I didn’t have time to visit, but I have heard great things! It’s a terraced garden filled with whimsical, colourful mosaic sculptures that are unlike anything else in New Zealand.
- Get on the Water: If you have time, book a harbour cruise. It is one of the only places in the world where you can see the rare, tiny Hector’s dolphins in their natural habitat.
- Grab a Treat: Stop by a local bakery for a pastry or visit the Barrys Bay Cheese factory on your way into town to pick up some local snacks for the rest of your road trip.
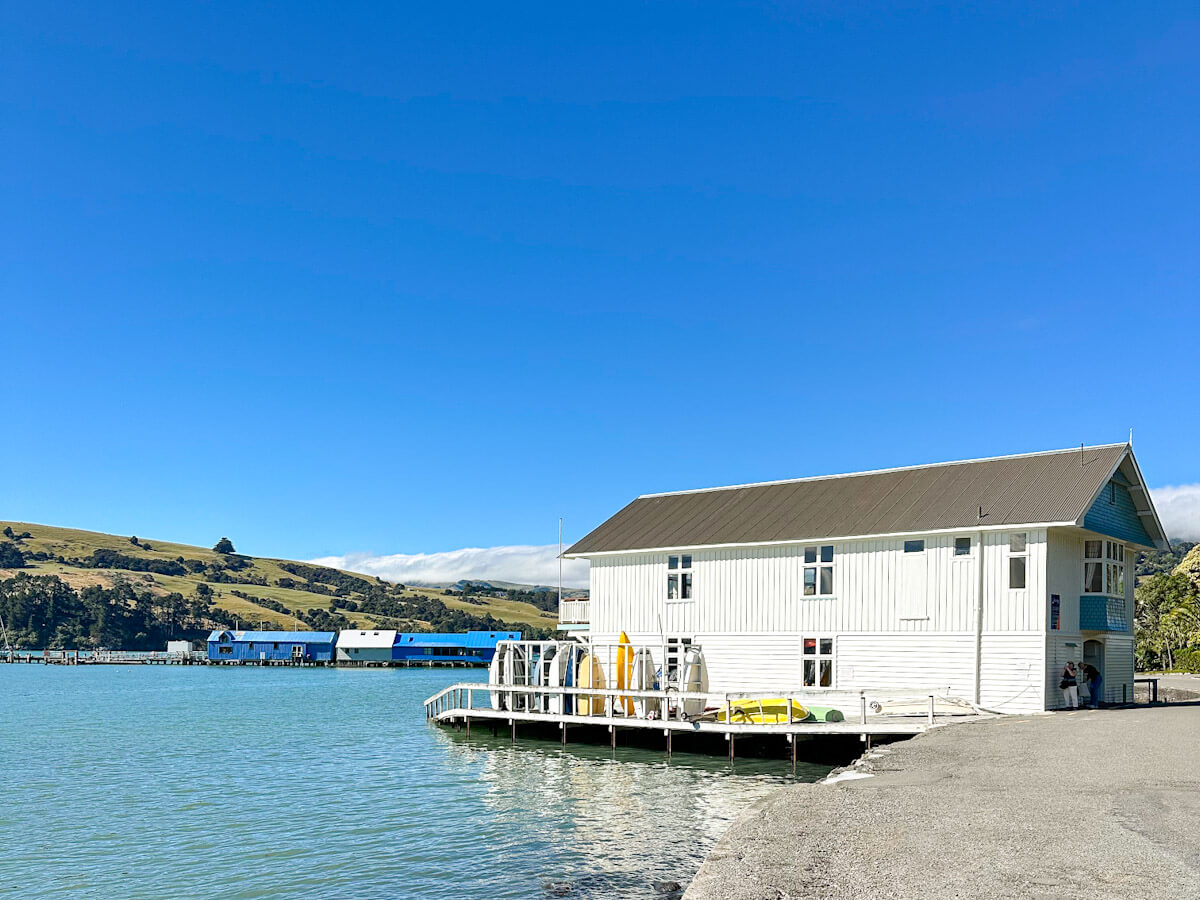
Where to stay in Akaroa:
- Freedom Camping: If you have a certified self-contained vehicle, there is a limited freedom camping area at the north end of the harbour car park. Note that spaces fill up very quickly!
- Akaroa TOP 10 Holiday Park: The best all-rounder. It’s well-maintained, features a heated pool, and offers incredible views over the harbour. It’s perfect if you want full facilities and a bit of comfort on your first night.
- Duvauchelle Holiday Park: Located just 10km before you reach Akaroa, this is a quieter, more relaxed spot right on the water’s edge. Great if you want to avoid the main town hustle.
Day 2: Akaroa to Mount Somers via Mount Sunday
As a fan of The Lord of the Rings, visiting Mount Sunday was a must on my 7-day Christchurch to Mount Cook itinerary. It is one of the Lord of the Rings Filming Locations In New Zealand, and used to depict Edoras, the capital of Rohan. However, I was blown away by it, and it became one of my favourite (and one of the most beautiful) places I visited in New Zealand. Even if you aren’t a fan of the films, I would still highly recommend this spot.

Set off from Akaroa for the 1.5-hour drive towards Methven and Mount Somers. Join Ashburton Gorge Road, which becomes Hakatere Potts Road. The route is paved until Hakatere, turning to gravel for the final stretch to Mount Sunday. Parking is 3km past Mount Potts Lodge; entry is free.
It takes around 45 minutes to walk to Mount Sunday itself. The area is absolutely stunning, set against the backdrop of snow-capped mountains and glacial rivers. The hike to reach the summit is an easy one, but it gives you absolutely incredible views. How can you not add it to your Christchurch to Mount Cook road trip? Trust me, it is so worth the detour!
As the drive to Mount Sunday is a there-and-back, and you have to retrace the same road. I chose to break up the drive by staying overnight in a campsite in Mount Somers. It takes approximately an hour to reach it from Mount Sunday. Meaning you are that little bit closer to Geraldine for the morning, without having too long a drive on day 2.
For more details on how to get to Mount Sunday, what to expect and other things to do in the area:
Visiting Mount Sunday, New Zealand: The Real Edoras
Where to Stay in Mount Somers
Mount Somers is a small settlement rather than a tourist hub, but it is perfect as an overnight campervan stop on this itinerary. I stayed in Mount Somers Holiday Park. Which is your best (and really only) option. It’s a simple, well-maintained park with powered and unpowered sites, clean facilities and a really peaceful setting. It is basic, don’t expect a pool or a café, but I booked very last minute, and the owner was so friendly.
Alternatively, if you wanted to shorten your drive after visiting Mount Sunday, you could stop in Lake Clearwater / Hakatere Conservation Park. It is actually closer to Mount Sunday than Mount Somers, and a beautiful freedom camping spot right on the lake if you have a self-contained van. Methven is another option. A slightly larger town, more facilities, and about 40 mins from Mount Sunday with a holiday park. Finally, if you want to shorten your drive on Day 3, then head straight to Geraldine. It is a little further, but there are more campsite options, and it shortens your drive on day 3.
Day 3: Mount Somers to Lake Tekapo via Fairlie, Geraldine and Three Creeks
Day 3 on the Christchurch to Mount Cook itinerary is less about reaching one destination and more about stopping at various places along the way. Start your day by heading to Geraldine, which is a lovely drive through rolling farmland. It is a pretty farming town and worth a quick wander around. If you have a bit more time, there are a number of museums to check out. From there head to Fairlie, mainly to visit Fairlie Bakehouse, which reportedly has the best pies in New Zealand.
From Fairlie, head towards Lake Tekapo. However, on the way, you will pass Three Creeks, which is definitely worth a stop. It is one of the quirkiest roadside stops in the South Island, part vintage store, part museum, part outdoor spectacle. It’s spread across a general store, a 1950s service station, a blacksmith shop and a trading post, all surrounded by classic cars, old farm machinery and macrocarpa furniture.
From Three Creeks, it’s then a short drive into Lake Tekapo, and as you drop down into the Mackenzie Basin, the landscape opens up dramatically. Think wide, tussock-covered plains ringed by snow-capped mountains, with that incredible turquoise lake ahead of you.
What to Do in Lake Tekapo
Head straight to the Church of the Good Shepherd when you arrive. It looks beautiful in the late afternoon light. And while it is stunning, be aware that it is an incredibly popular spot, so expect crowds!
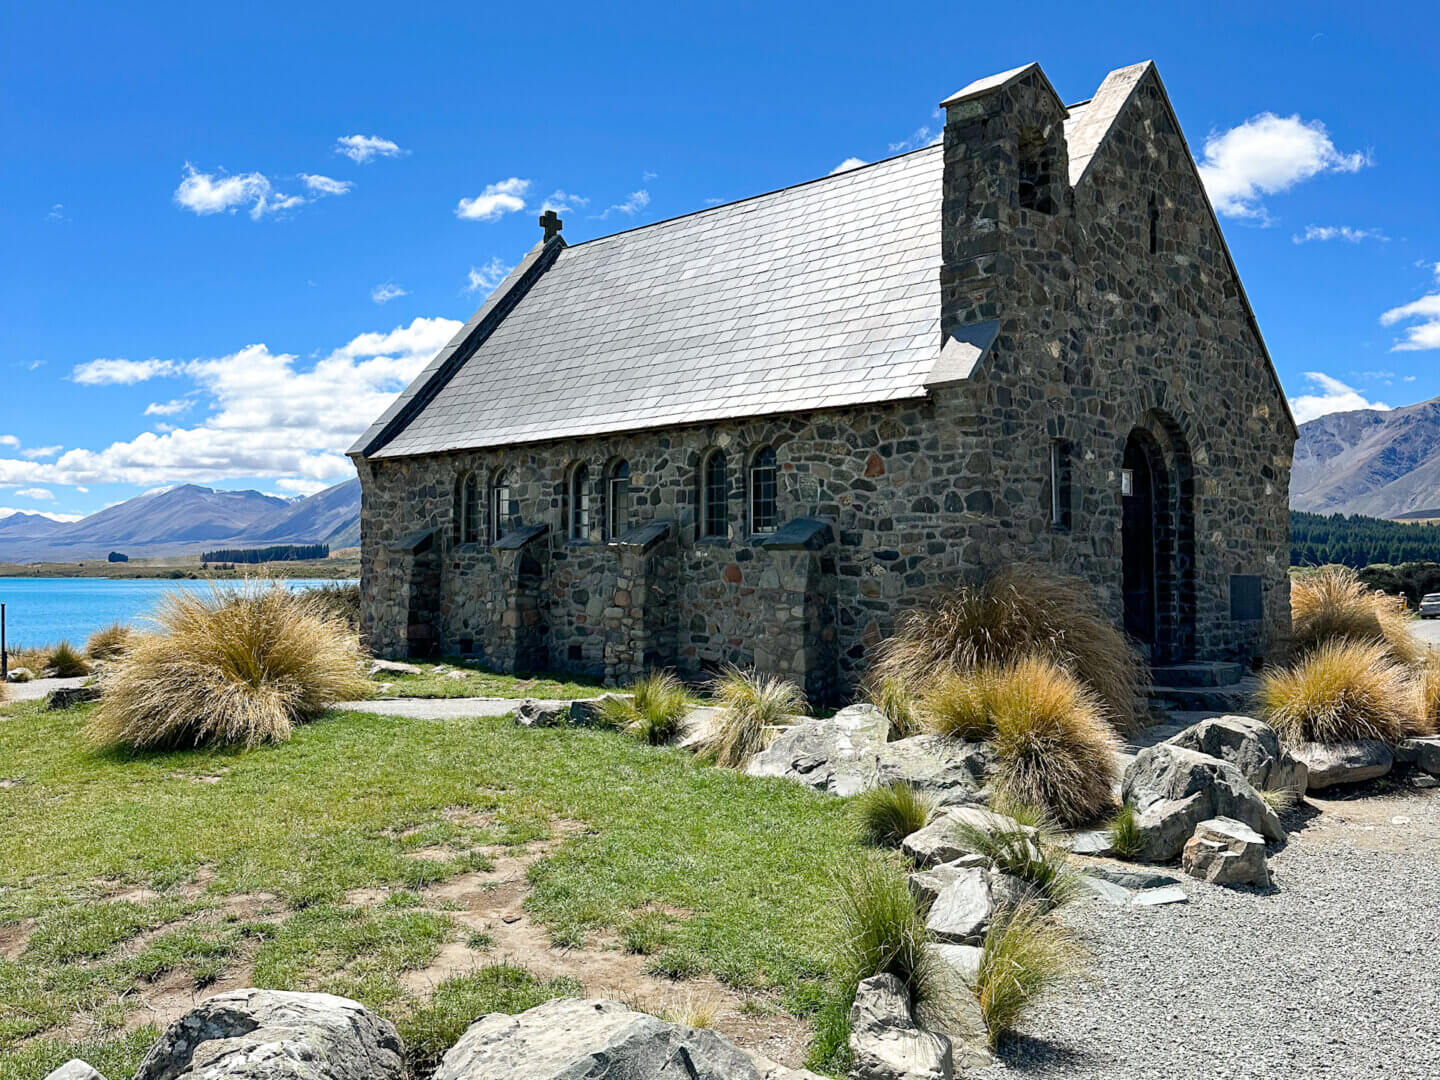
Lake Tekapo is widely considered the best place for stargazing in New Zealand. Home to the University of Canterbury Mount John Observatory, it offers world-class views of the Southern Hemisphere sky. Trust me: if you have a clear night, the late-night sleep sacrifice is 100% worth it.
Where to Stay in Lake Tekapo
I stayed at Lakes Edge Holiday Park, which I’d highly recommend. It’s well located, has great facilities, and some of the powered sites have direct views over the lake. As Lake Tekapo is a popular spot, try to book one of those in advance if you can. It fills up fast, particularly in summer.
Day 4: Lake Tekapo to Lake Ōhau via Twizel
If you feel energised, start your day with a hike up Mount John before setting off. It’s about a 2-hour round trip, and the panoramic views over the lake and the entire Mackenzie Basin from the top are stunning.
Once you leave Lake Tekapo, it is quite a straightforward drive to Twizel. It should take around an hour along SH8, with the Mackenzie Basin opening up around you the whole way. Twizel itself is a small, functional town rather than a destination, but it’s worth a stop for two reasons. Firstly, this is the place to stock up on supplies and fuel, as there are no petrol stations in Mount Cook. And secondly, if you’re a fellow Lord of the Rings fan, there’s a detour you won’t want to miss.
If you are a fan of the trilogy, make sure to save this post for your travels: Lord of the Rings Filming Locations in New Zealand
Just outside Twizel is the perfect location that was used to film the battle at Pelennor Fields. The field sits on private land, so you can’t walk it, but you can drive alongside it. Head towards Ben Ōhau from Twizel, and you’ll find it. When I visited, there was also a stop called the Peace Ring, which was a sculpture of the ring created overlooking the filming spot, in the owner’s garden. As of June 2026, it now seems this has closed. Check locally before heading out, as things may have changed
After your Lord of the Rings fix, head back towards Twizel. Take some time to walk along the Pukaki Flats, which is an open block of hard tussock grasslands just north of Twizel. It’s 6km one way, so go as far as you feel like; you don’t need to complete the full route to get the views. And you will be rewarded with great views of Mount Cook. Afterwards, head to Lake Ōhau for the best overnight stop.
Where To Stay In Lake Ōhau
This was my favourite place I stayed in my campervan, and everything I had been dreaming of when I hired a campervan. I stayed at Round Bush campsite, which is a camping spot on the shores of Lake Ōhau. It does have a long drop toilet, so technically, a self-contained vehicle isn’t even needed. Free to camp, and the most stunning scenery. I grabbed a spot right by the lake’s edge, and first thing in the morning, had a cup of tea with the doors opening, overlooking the lake. Genuinely couldn’t have been happier.

Day 5: Lake Ōhau to Mount Cook via the Pukaki Flats
Start your day by leaving Lake Ōhau so you arrive at Mount Cook National Park nice and early. I arrived at the White Horse Campground car park around 8.30 am, and it was already getting full!
On your way, make sure to stop at Mount Cook Alpine Salmon shop, which is right on the edge of Lake Pukaki. Even if you don’t stop to buy anything, pull over here. From here, this will be your first view of Aoraki Mount Cook at the end of the lake, sitting above that stunning glacial blue water. Afterwards, head straight to Mount Cook National Park.
What to do in Mount Cook
When you arrive, head for the iconic Hooker Valley Track. A very gentle, almost completely flat walk. It almost seems unreal that you should be rewarded with such outstanding landscapes, with so little effort. It’s a great thing to do first thing, before the day trips get too busy. The walk is approximately 10KM there and back, and should take around 3 hours. Even if you have no fitness, it wouldn’t be a challenge. Pick up the trail from White Horse Campground and follow the well-trodden route until you reach Hooker Lake, with Mount Cook in the background.
Afterwards, head into Mount Cook Village for a little exploration. It won’t take long. There are a couple of cafes and a restaurant in the Hermitage Hotel. There is also the Sir Edmund Hillary Alpine Centre, which can be found, again, in the Hermitage Hotel.
A little add-on if you are a Lord of the Rings fan: find the filming spot for Minas Tirith. It was primarily brought to life through large-scale sets, CGI, and specific filming locations in New Zealand rather than a single standing structure. However, the mountains near Mount Cook National Park provided the iconic backdrop for the city. This Google Maps location gives you the best place to view the location.
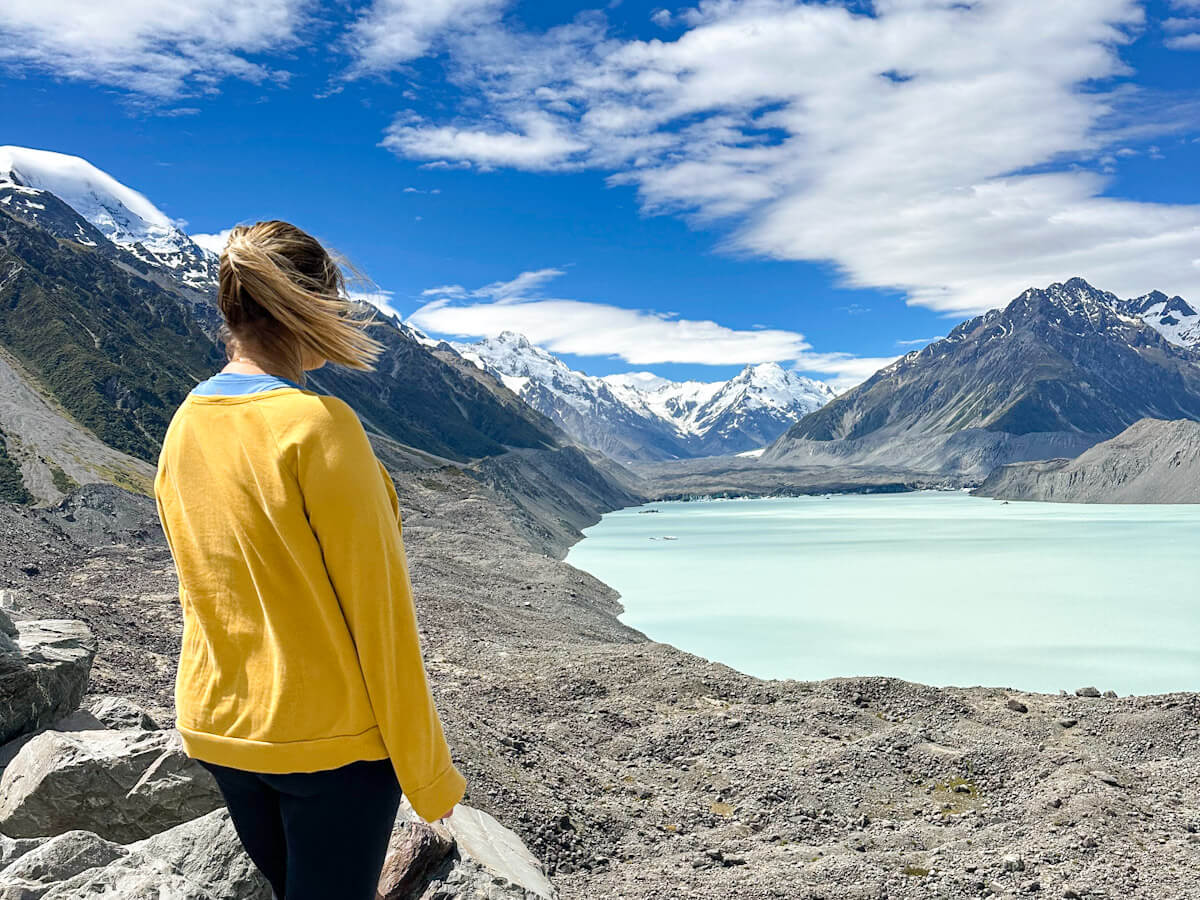
To finish the day, take a gentle, easy hike to the Tasman Glacier viewpoint. Picked up from the Blue Lakes carpark, about 3KM from Mount Cook village. It is a gradual incline, with steps up to the viewpoint over the Tasman Glacier, and it only takes around 30 minutes to get there and back. There are excellent views of the lower Haupapa and Tasman Glacier as well as the lake, icebergs, and the mountains at the head of the valley.
Where to Stay In Mount Cook National Park
If you are in a campervan, there is only one place to stay: White Horse Hill Campground. It is situated near walking tracks with basic facilities and spectacular views. It is DOC, with a charge of $10, but it gets booked up very fast! Suitable for camping and campervans. This is where I stayed, and the most stunning campsite views. Make sure to book two nights, so you have time to enjoy all Mount Cook National Park has to offer.
Day 6: A Full Day in Mount Cook National Park
Day 6 involves no driving, allowing you to focus entirely on the iconic Sealey Tarns and Mueller Hut hike. Starting from White Horse Campground via the Kea Route, this is a two-stage hike.
The first part of the hike takes you to Sealey Tarns. This is classed as an ‘easy/intermediate’ track, although I disagree! It is also referred to as the ‘stairway to heaven’ and consists of 2200 steps, leading you up to the lakes of Sealey Tarns. Despite the monotony of the steps, it will be worth it for arguably one of the best views of Mount Cook. The money shot moment is when you reach the plateau with benches, where you can stop and revel in the stunning scenery. Once you reach here, you can decide whether to continue or turn back.
Reaching Sealey Tarns is only the halfway point. Continuing to Mueller Hut requires an additional two hours of challenging hiking. Unlike the first section, this route is unmaintained and involves rocky terrain, alpine scrub, and a final 50-metre ascent up a loose scree slope.
You will see Mueller Hut on the brow, and you have made it! Make sure to take layers, as even in the summer, it can get cold at the top. Mueller Hut is a 28-bed DOC hut, and you can book to stay overnight. It does get very booked up, but I would have loved to have been up there for sunset and sunrise the next morning. If you have time, what an incredible experience!

To help make the most of your time in Mount Cook, check out this post:
Visiting Mount Cook/Aoraki, New Zealand: Epic 3-day Adventure Itinerary
Day 7: Mount Cook back to Christchurch
Before heading back to Christchurch, start your day with a sunrise walk to Kea Point. Because of the direction the Kea Point track faces, you won’t see the sun rise directly over Mount Cook, but you will still be treated to a breathtaking view as the first light hits the mountain’s peaks. The quiet of the morning makes this such a peaceful and calm way to start the day.
Once you’ve packed up the van for the last time, begin the drive back towards Christchurch. Today is the longest day of driving, but break it up with a stop at Peters Lookout on the way. It’s a short walk from the road and offers you a lovely last look at the views back over the Mackenzie Basin.
As you get close to Christchurch, fill up with fuel before you drop the van off. Most rental companies will charge you if you don’t return it at the same level you picked it up at. And finally, try not to be too sad saying goodbye, but it’s easier said than done. It was an emotional goodbye for me! I loved my little van and had genuinely had the best week of my time in New Zealand in it.
Is the Christchurch to Mount Cook Route Right for You?
As mentioned, I chose to travel around New Zealand using multiple different forms of transport. Taking the Kiwi Experience Bus for the majority (read about this here), as well as hiring cars in Northland and Queenstown. I also knew I wanted to try van life, but I wasn’t ready to commit to two months of it, so this was the perfect middle ground. The distances on this route aren’t overwhelming, the landscapes were absolutely stunning, and the freedom camping spots are some of the best in the South Island.
Top Tip: Find out all about my experience of solo travel in New Zealand in a campervan here (spoiler – I LOVED it!):
Solo Travel in New Zealand: Campervan Diaries
This route works particularly well if:
- You want to try campervanning without committing to a long trip
- You’re travelling solo and want flexibility
- You want to visit Mount Cook properly, not as a rushed day trip
- You’re looking for genuine off-the-beaten-track stops alongside the well-known ones
Christchurch to Mount Cook Campervan FAQs
Where is the best place to pick up your campervan?
Christchurch Airport is the most convenient pick-up point. Most major rental companies have depots nearby, and then you can drive straight out of the city without navigating busy streets in an unfamiliar vehicle.
What type of campervan should you book for this route?
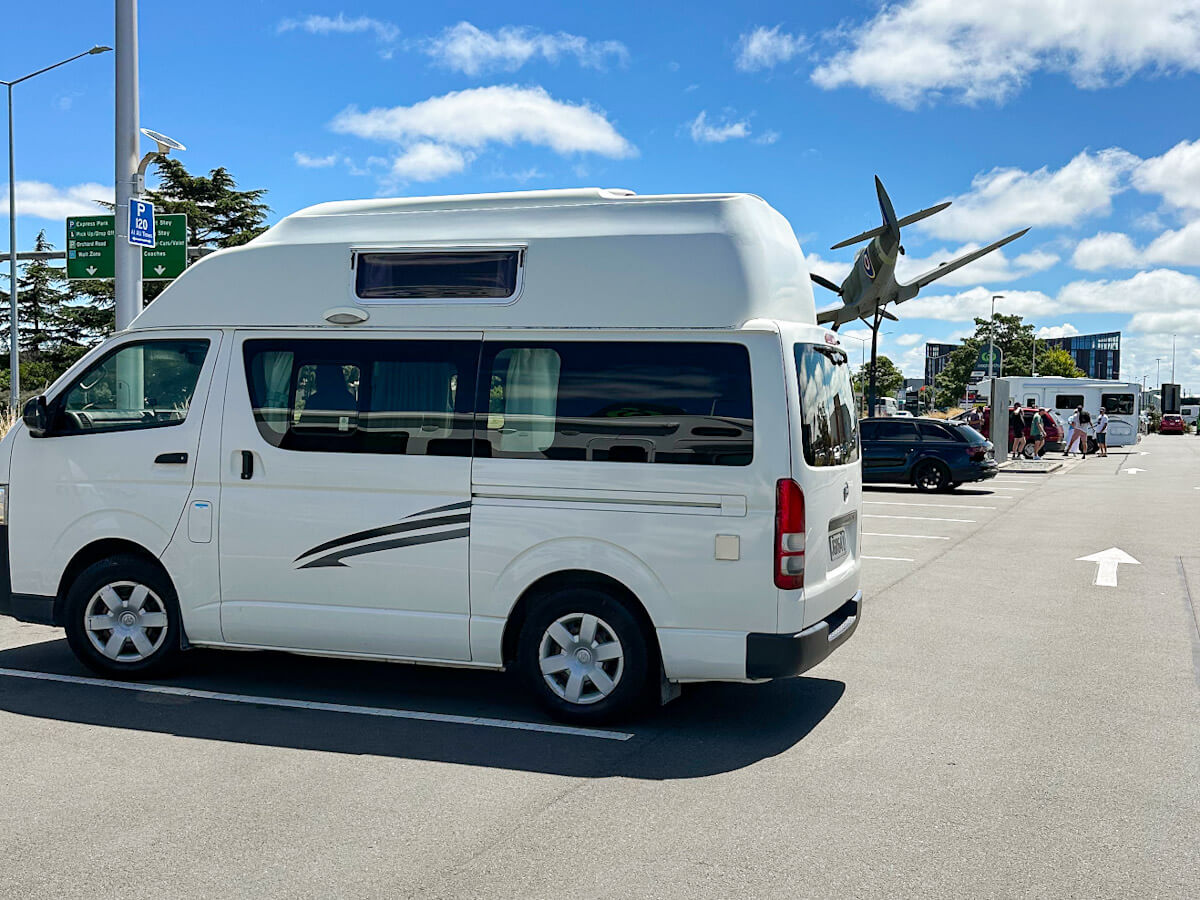
I hired a self-contained two-berth with a fold-away double bed, which was perfect for a solo traveller. A self-contained vehicle isn’t strictly necessary on this route as most campsites have facilities, but having it gives you far more flexibility if you don’t want to book ahead. Have a look at the options that suit you best HERE
Do you need a self-contained campervan for this route?
Not strictly, no. Most overnight stops on this route have toilet facilities. That said, I’d recommend it anyway, as it gives you the option of freedom camping, and that flexibility is half the joy of campervanning. Take a look HERE.
What is the best time of year for a Christchurch to Mount Cook road trip?
I visited in early January, which is peak summer in New Zealand. Fantastic, but also the busiest time of year. If you want fewer crowds, shoulder season (November or March) is worth considering.
Is this route suitable for first-time campervan drivers?
Yes. This was my first time in a campervan, and I found it very manageable. The driving days aren’t too long, the roads are straightforward, and there’s only one notable gravel road section (to Mount Sunday).
How much does it cost to hire a campervan in Christchurch?
This varies hugely depending on the time of year and how far in advance you book. I hired last minute in early January, which is peak season, and paid NZD $2,354 for the week. You could likely pay significantly less by booking ahead or travelling in shoulder season. Always factor in fuel and campsite fees on top.
Can you do Christchurch to Mount Cook without a campervan?
Technically, yes. Day trips from Christchurch exist, but they make for very long days and don’t give you nearly enough time in Mount Cook National Park. Having your own transport and staying overnight in the park is what makes this trip special.
Does this route work for solo travellers?
Absolutely! I did it entirely solo, and it was one of the best weeks of my entire time in New Zealand. The campsites are sociable if you want company, and the freedom to stop wherever and whenever you like is even more valuable when you’re travelling alone.
Christchurch to Mount Cook: Final Thoughts
If you are looking for a shorter trip in a campervan in New Zealand, then I can’t recommend this route enough. In all of my 8 weeks in New Zealand, I saw some incredible things, but this week was undoubtedly my highlight. It wasn’t just the fact that I was seeing some of the most stunning places, but also that the campervan gave me freedom and more confidence than I thought possible during my trip. If you are on the fence, then let this post be the nudge you need. You won’t regret it!
Top Tip: If you are unsure about embarking on campervanning as a solo traveller, then let this post be the guide you need: Solo Travel in New Zealand: Campervan Diaries
Thanks for reading my 7-day Christchurch to Mount Cook Itinerary!
Read more New Zealand Blogs:
- Things to do in New Zealand: the ultimate list
- Solo Travel in New Zealand: Campervan Diaries
- 18 Best Things to Do in South Island, New Zealand
- 18 Best Things to See in North Island, New Zealand
- Visiting Mount Sunday, New Zealand: The Real Edoras
- Lord of the Rings Filming Locations In New Zealand
- Visiting Mount Cook/Aoraki, New Zealand: Epic 3-day Adventure Itinerary
- Things to Do in Abel Tasman: A Stunning Trip to New Zealand’s Smallest National Park
- Things to Do in Franz Josef: 12 Epic Adventures
- Franz Josef Helicopter Hike: Is it worth it? And everything you need to know
Useful travel tools and links
To help you plan your trip, here are some of my favourite useful travel tools and links I use on a daily basis to travel:
- Hostelworld: The place to book hostels and cheaper accommodation. Perfect for backpacking trips. With 24 hour cancellation options, and easy to manage from your account.
- Booking.com: One of the largest places to search for hotels around the world. Often with free cancellation options.
- Hotels.com: Also a fantastic place to source hotels, and they offer a loyalty programme.
- Expedia: Another option for hotels as well as a great place to search for flights, car hire and more.
- Skyscanner: The best place to search for flights to find the best rates.
- GetYourGuide: Easy access to book a wide range of curated tours, activities, and experiences around the world.
- Viator: A great place to search for group tours and day trips. Part of the TripAdvisor brand.
- KnowRoaming: eSIMs are a game changer for travel. Purchase before you go and be connected as soon as you land. KnowRoaming eSIM plans keep you and your devices seamlessly connected in 200+ international destinations.
- G Adventures: The ‘go to’ for all group travel tour adventures. Perfect for solo travellers.
- Amazon: Link to my storefront with ALL the useful gadgets and items I couldn’t travel without.
If you found this post on the 7-day Christchurch to Mount Sunday campervan itinerary helpful, please pin it for later

Discover more from Where Charlie Wanders
Subscribe to get the latest posts sent to your email.